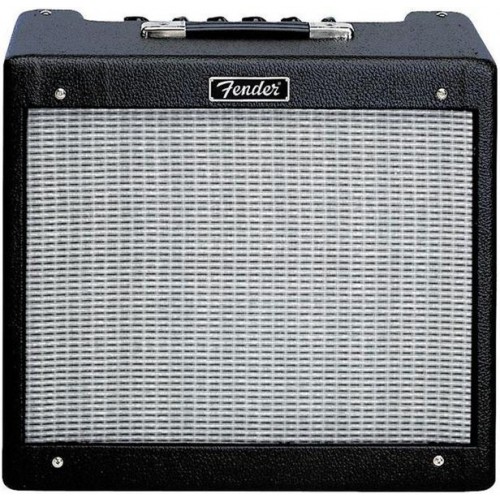
I was looking for a Fender Champion 600 (or alike) for room practice and finally found those Tube 5 amps by Fame, the brand sold by MUSICSTORE. The original one (not "Special") was about 90€ and the "Special" one about 115€, claiming a Jensen speaker and a JJ 6V6 instead of the "no-name-china-cheap-stuff".
As all of these small have almost the same 6V6 or EL84 Single Ended design (Harley Benton GA5, Gibson GA-5, Fender Champion 600, Gretsch G5222, etc) but being sold between 200€ and 300€, I suddenly found this amp VERY attractive! If I could have done it from scratch, the 115€ would have paid the transformers but no more, and if I bought this amp, I would still have money left for lot of mods, if needed, and well, no need to build!... So it was quite a "no-brainer" situation!
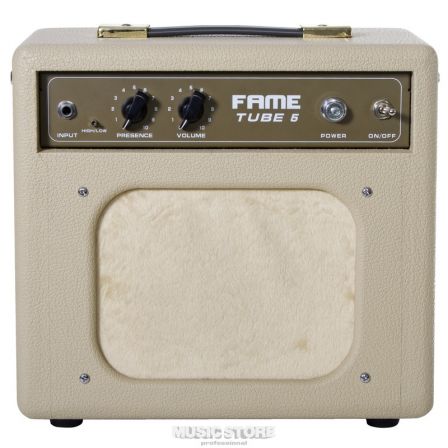
Once at home, the first thing I did was playing it, at low volume, and I was quite happy with that amp! But once I had the opportunity to turn the Volume knob a bit higher... Aaaargh... things went wrong!!! Farting, ugly drive, especially with basses... Playing chords with my Jazzmaster Classic Player was just an insult to the guitar!
Well, next step... schematic drawing! And guess what, this amp is THE SAME as the Fender Champion 600, I mean, same components names and manufacturers, but with few differences :
- a High/Low switch instead of two seperate input jacks
- the tone stack is slightly different, making the mids notch frequency a bit lower and highs with more boost but...
- "Presence" knob added, and it is a High cut placed between the second stage of the 12AX7 (Ruby) and the 6V6, so you can attenuate the High boost (Why the hell didn't they simply put a pot on the tone stack???)
- The B+ cap is a 220µF (nice!!!) instead of the 22µF on the Fender Champion 600
- 100nF added on the cathode of the 6V6
- the output transformer has an non-wired 8 ohm tap (yum!!!)
So, as you see, it is even better than the Fender Champion 600!!! But still, we need to work on that amp to make it better, and you'll see that it is almost easy.
Mod 1 : SNATCH THAT BLANKET!!!
Watching it, I was not sure to like it, but now I have removed it, I just hate it!!!
Imagine somebody speaking with a scarf on his mouth, and now remove the scarf... This piece of fabric was choking the speaker seriously and was the reason of most of the flabby sound!
See the difference between the blanket and a standard grill cloth... Guess who is the most "sound friendly"...
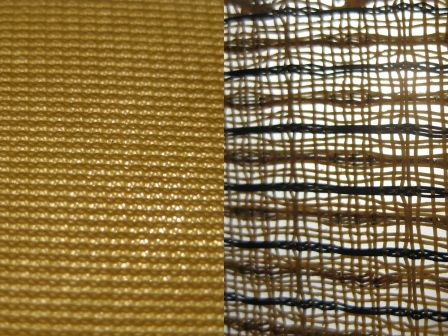
The new grill cloth (Oxblood with gold stripe) may arrive soon...
Mod 2 : SPEAKER OUTPUT
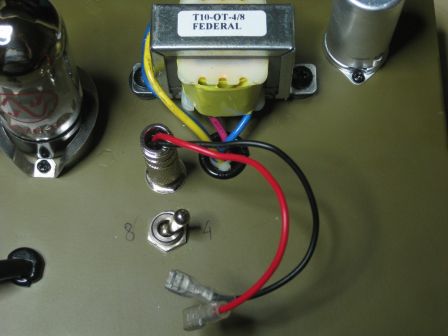
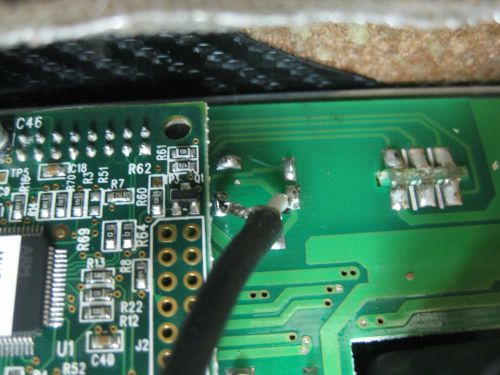
As I mentioned earlier, the OT comes with a 8 ohm tap. The wire (blue) is not connected on the board so let's do something with that!
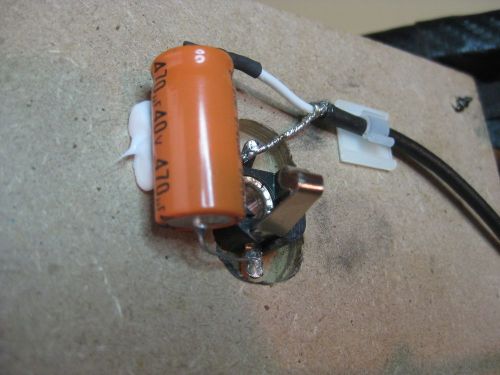
A robust switch (APEM 636H/2) and a jack socket to be able to plug an external speaker and we're done!
Mod 3 : POWER
I don't like sag!!!
Sag is a loss of power happening when both the transformer and capacitors can't supply enough current when playing high level sounds like when you strum bass strings. It results in a farty distortion that I simply hate!
So I replaced the 3 aluminium capacitors and oversized them from 22µF to 100µF, the biggest that would fit in the amp. Now, along with the stock 220µF on B+, I am miles away from sag, and that makes me happy!
I twisted the wires that needed to be twisted:
- the red wires from the transformer, reds (HV) and greens (6.3V)
- the two black wires connecting the heater supplies of the 12AX7 and the 6V6
- the red and black lamp wires that are also on the 6.3V
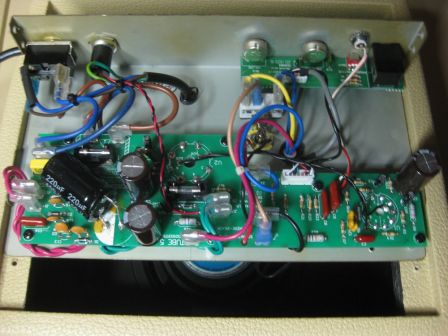
Note that the laid 220µF capacitor is not a mod! This is from stock!
Mod 4 : TONE STACK
Let's compare the Fender Champion 600 to the Fame Tube 5 Special :
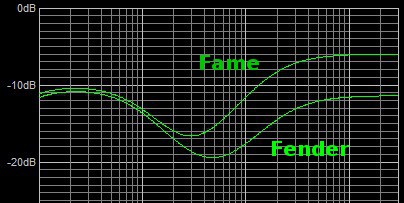
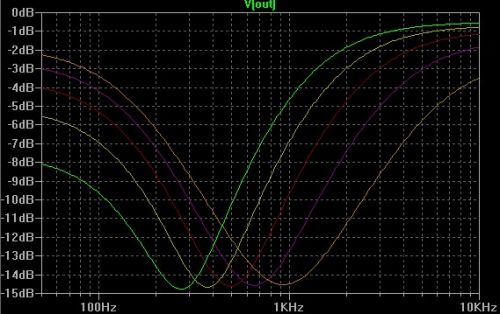
You can see that the highs are much louder on the Fame BUT remember, you have that Presence control to reduce them!
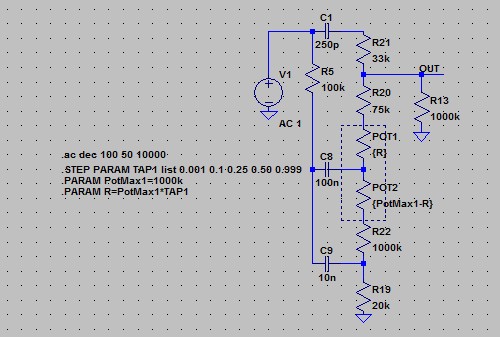
The mids "hole" is around 300Hz on the Fame and 500Hz on the Fender. This is mainly due to the C1 capacitor which is 680pF on the Fame and 250pF on the Fender. You got to know that this "mid hole" is made to balance with the pickups of your guitar which have a peak in their frequency response. But every microphone has his own resonant frequency! I have tried several capacitors here, from 250pF to 680pF and it has a great effect on overall sound of the amp. But if I like one setting for a guitar, I'd prefer another setting for another guitar... So I plan to use a rotary switch, 3 positions, to be able to select the "hole" frequency! For now, I have 250+100=350pF installed, as you can see on the picture above (NB: the stock C1 is a ceramic capacitor but I use Silver Mica)
EDIT : capacitor switch is a bad idea as it "pops" a lot when switching... no good!!! Please read this instead, it works like a charm! :
http://vinic.blog.free.fr/index.php?post/2015/03/19/Make-your-fixed-tone-stack-sweepable
For more flexibility, I also replaced R19 (20k on the Fame, 15k on the Fender) with a 100k linear potentiometer to allow more flexible settings. Turned CCW, it cuts the mids and turned CW, it boosts them so the tonestack is almost flat (depending on the Presence setting). Here is what you get at 0-25-50-75-100% on the potentiometer.
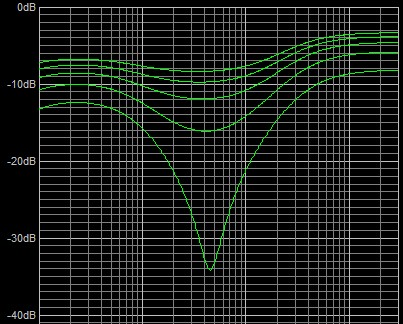
Edit April 6 - 2014 : I should have used a logarithmic potentiometer for a more "ear-linear" response
I really prefer that mod from the tone stack bypass mod because as I said, it is more flexible and moreover, it keeps the headroom of the amp. I play loud guitars (high output levels) and the bypass would have made this amp a fuzz pedal...
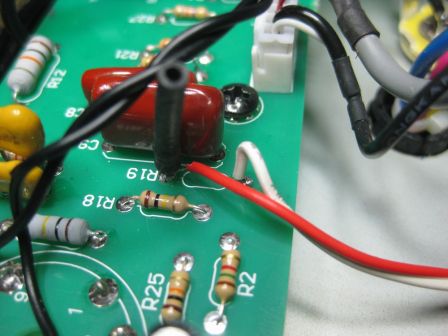
Again, refer to the picture of the PCB above, and here is a close up of R19, which is hidden under the black sleeve, and replaced by the wires going to the front panel potentiometer.
Mod 5 : 6V6 BIAS
I smelt something running very hot in that amp... it was the 6V6 and its plate was getting blue...
A bit of calculation
Class A amplifiers are supposed to run at 90% of the max plate dissipation Wa, and Wa=14W for the 6V6. So the 6V6 should work at 12.6W here.
Picking the Fender Champion 600 schematic as reference, found R10=470ohm, and TP8=Vk=23.6V. The cathode current is Ik=Vk/R10=23.6/470= 50.213mA
Let's calculate screen current by measuring the voltage drop on R26 (470ohm) : V(R26)=0.60V. So I(R26)=0.6/470=1.277mA.
Then Ia = Ik - I(R26) = 48.936mA
I read 343V from pin 8 to 3 on the 6V6 so the anode power dissipation is Wa = 0.048936 x 343 = 16.8W (!!!) i.e. 120% of the maximum value of Wa... THIS IS HOT BIASING!!!
Setting R10 to 750ohm 2W resistor make the 6V6 run at 90% without noticeable sound change but your 6V6 will thank you! From here, you can decide to bias it colder or hotter. You can see on the board that I used two resistors that I had in stock to achieve an approaching value (680+100).
Edit April 6 - 2014 : real measurements of screen current instead of 5% approximation
Mod 6 : OUTPUT TRANSFORMER
I made a quick test of the transformer bandwidth, which I found to be very flat from 50Hz to 10kHz. I don't plan to change it, I think this may be a bit expensive as the aim is to have a good working BUT CHEAP amp.
Nevertheless, there was something annoying. When I was doing some tests on the circuit, replacing the speaker by a 5 ohm 25W resistor, the OT was vibrating hard making the chassis vibrating as a speaker. In other words, I was hearing sounds without a speaker connected! I think it is the core of the transformer vibrating.
To reduce this, I inserted rubber washer between the OT and the chassis. The vibration is now acceptable.......
CONCLUSION
In the end, there isn't much to do to make that amp sound great : removing the blanket does a huge difference with no cost at all!!!
6V6 bias is a good idea too, in my humble opinion.
Other mods are bonus mods but the tone stack mods are great. I can't stop playing with the knobs because this amp is now VERY versatile!!!
I didn't talk about the speaker because it is a good one, maybe not the best. I have read that the Weber Alnico Signature were great in this kind of amps, but you'll have to care about the speaker coming very close to the 6V6.
Other point to mention, the 12AX7 shield is narrow... you can only put tubes with a diameter <22mm... All JJ tubes will fit, but mind this point before ordering a new tube. I have ordered some other shields from tube-town.net to see if they were wider.
OK, let's put it all back inside, time to play with the great little amp a few days before applying the last mods (grill cloth, C1 selector, and few orange drops for the mojo)
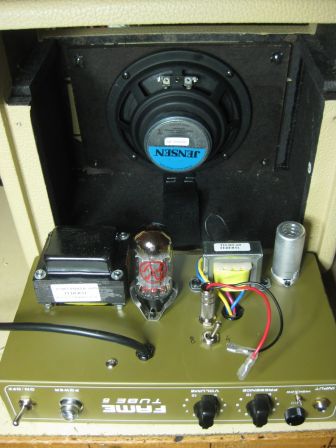
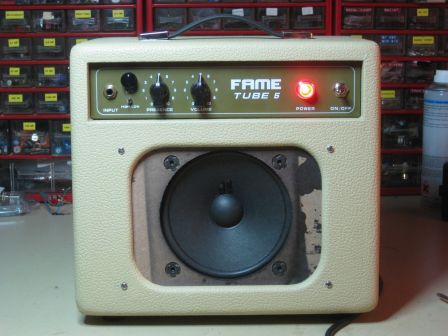
Oh yes, I forgot to mention that I also changed the handle!  I couldn't stand that golden hardware among all the other silver ones... Please tell the amp designer that "retro" is different from "kitsch"!!!
Have fun!
vinic



 I couldn't stand that golden hardware among all the other silver ones... Please tell the amp designer that "retro" is different from "kitsch"!!!